Podia has supported tags for a while now, but the recent email upgrade has really supersized their potential.
Let’s see what they are, what they can do and how you can use them to your advantage.
Tags: The Basics
We’ll start with a few basic questions, just to get us warmed up.
What is a tag?
A tag is really just a way to attach a simple label to a Podia audience member.
For instance, you could add a “Client” tag to anyone in your Podia audience who’s also a client.
How do you create a tag?
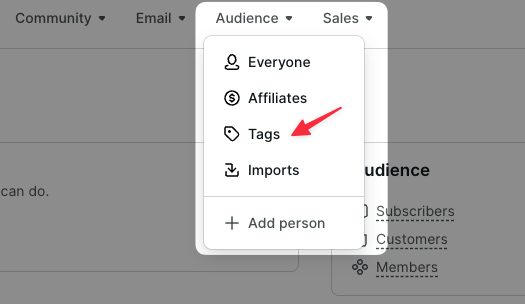
Creating tags is easy. Just select the Tags option under the Audience menu in Podia.
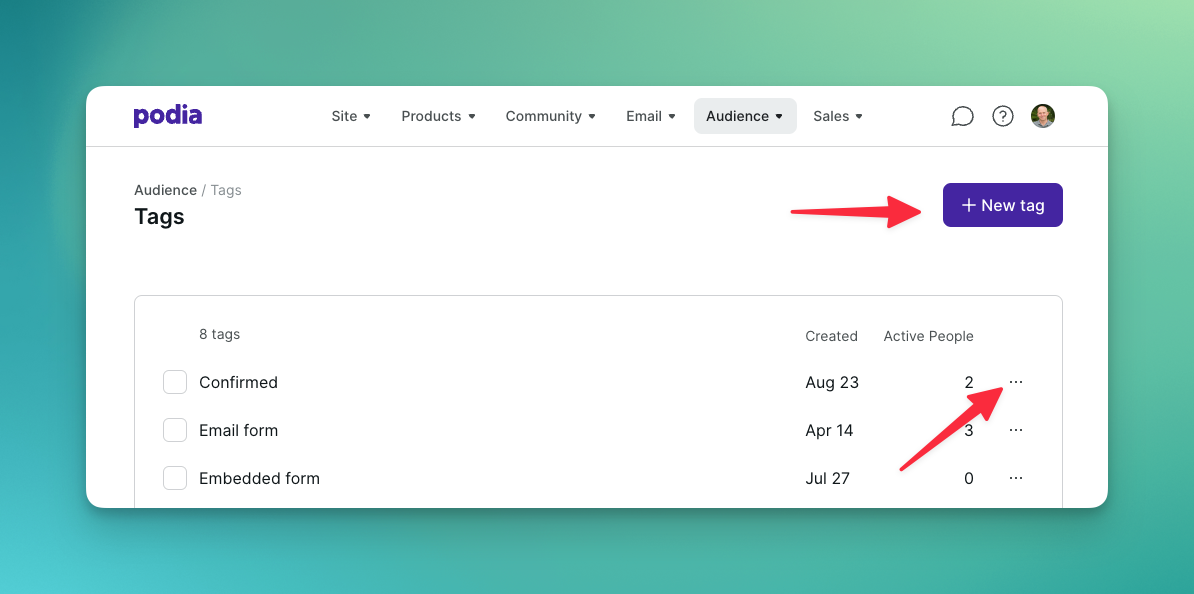
Once on the Tags page, you can add new tags and edit or delete existing ones.
Note: You can call tags anything you like, as long as you don’t exceed 100 characters.
How do you add tags?
There are four (plus one!) ways to add tags to your Podia audience members.
(I say “plus one” because the last method is a bit more advanced and won’t apply to most users.)
Method #1: Adding tags manually
The first method has been around for as long as Podia has supported tags.
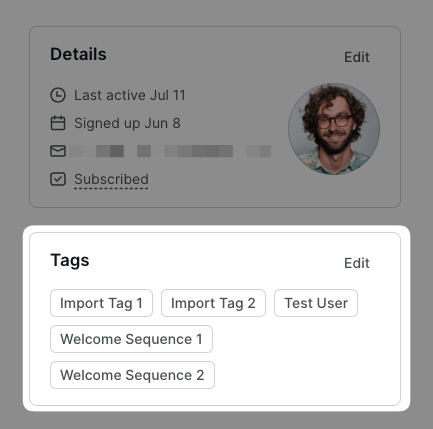
When viewing an audience member’s profile you’ll find a section showing the tags they have.
Just click the edit button and you can edit or delete existing tags and add new ones.
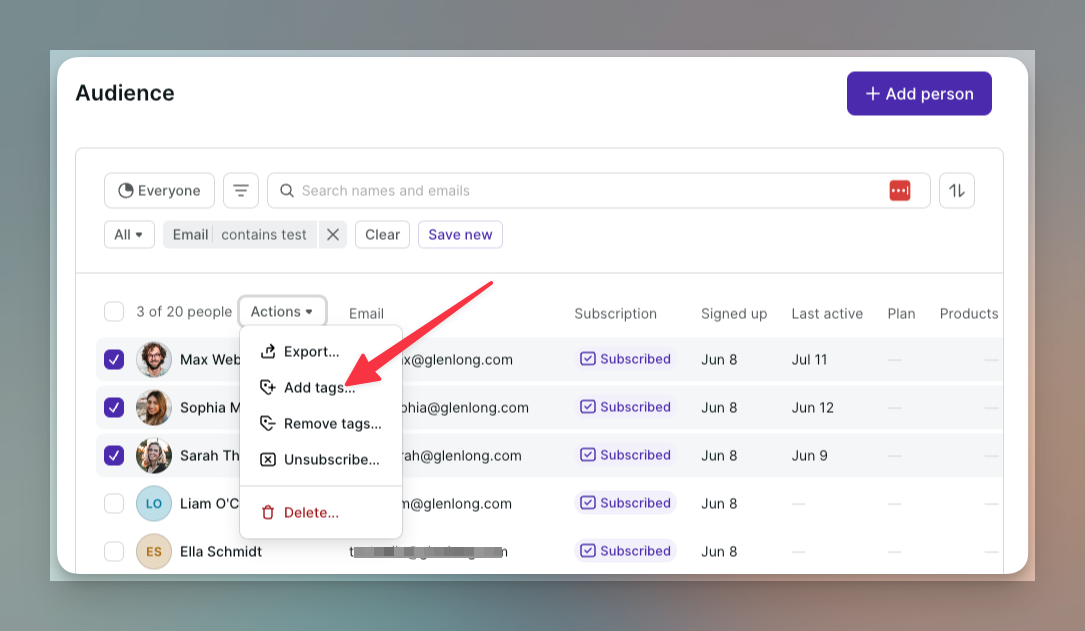
By the way, you can also add tags in bulk.
Simply use the audience filter to find people you want to tag, check the boxes next to their names, then use the “Action” drop-down to “Add tags…”
Method #2: Adding tags via an email form
The recent updates to Podia Email brought with them the ability to create multiple email forms and create different opt-in “paths” for your website.
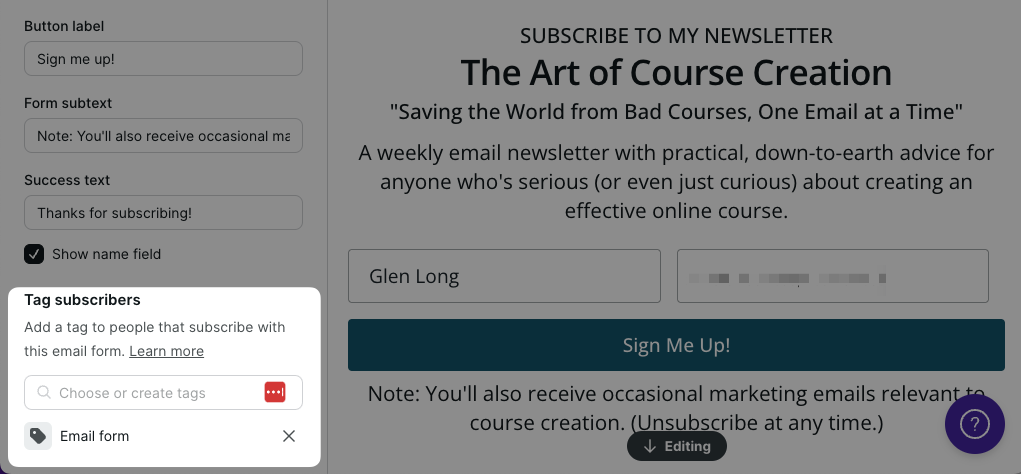
These forms allow you to tag new subscribers in different ways depending on which form they submit.
To set this up, simply choose one or more tags when creating each email form in the Site Builder.
Method #3: Adding tags via a link
Another cool feature which came along with the email upgrade is the ability to add tags to any of your links inside broadcast or campaign emails.
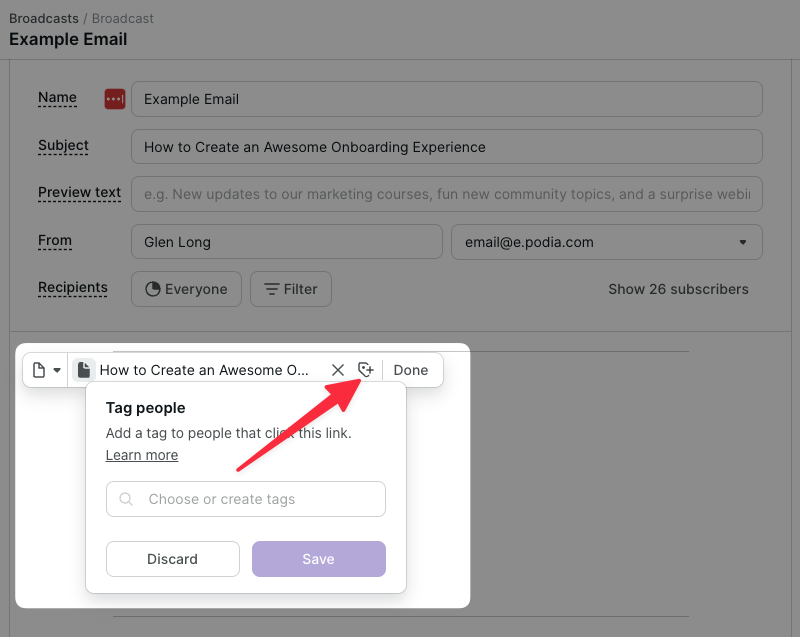
This means when a subscriber clicks the link they go to the destination page as expected but they also get one or more new tags inside Podia.
This opens up some powerful possibilities which we’ll explore shortly.
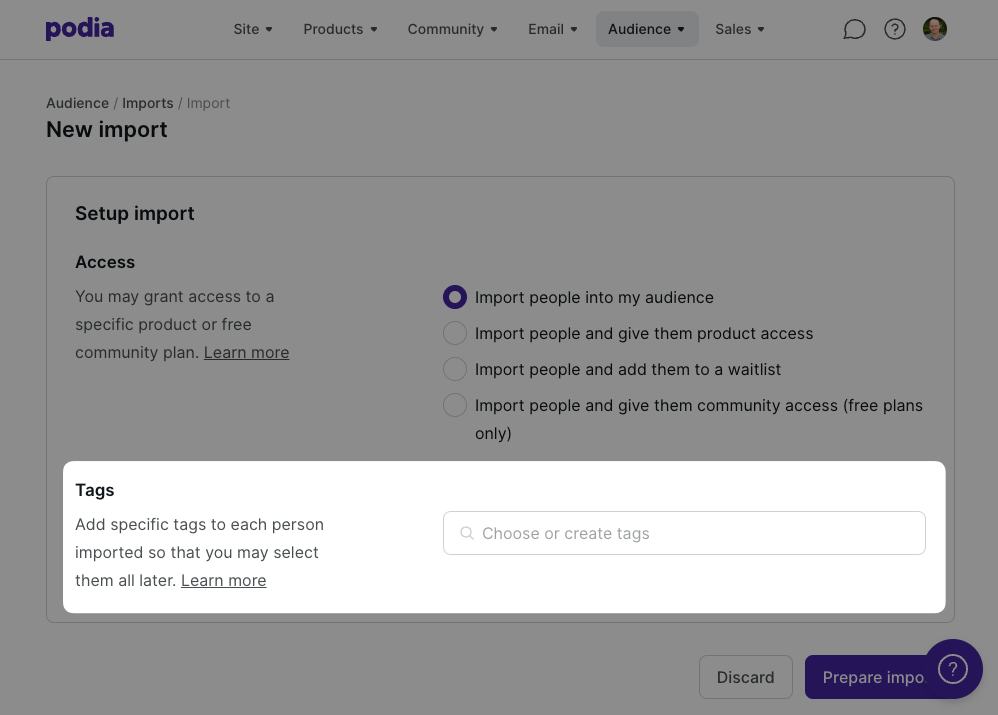
Method #4: Adding tags on import
If you’re moving to Podia Email from another provider you can easily import your existing list of contacts.
The import feature is relatively simple, but it lets you add one or more tags to each batch of contacts you upload.

Amongst other possibilities, this lets you keep track of where people come from.
Bonus Method: Adding a tag via Zapier
This one’s less basic, but for completeness you can also add a tag when you subscribe someone via a Zapier integration (aka, zap).
This can be useful if your website isn’t on Podia but your email list is.
How Can Tags Used in Podia?
So we know how tags get created and added to subscribers, but how can they actually be used?
I’ll give you the technical answer first so you understand their capabilities, then we’ll bring those capabilities to life by looking at some more practical real-world scenarios.
Essentially, you have three ways to use tags in the context of Podia Email.
#1 Filtering the recipients of a broadcast
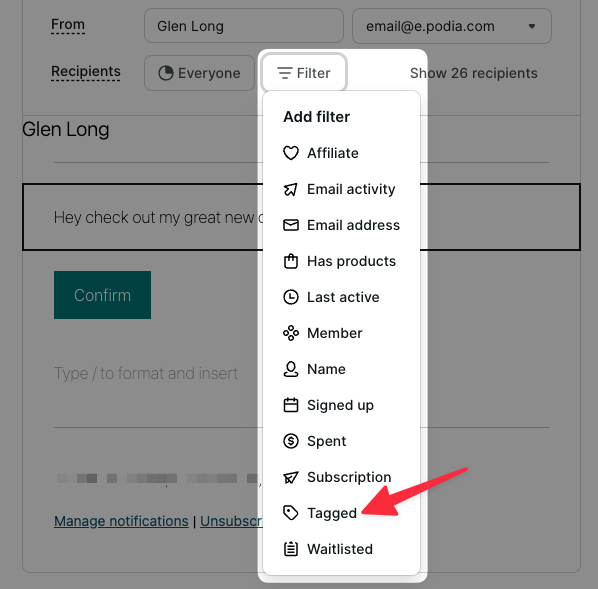
When sending a broadcast you can use Podia’s powerful filtering feature to decide exactly who gets your email blast.
One of the available filters is the “Tagged” filter, meaning you can select people based on the tags they have (or don’t have).
Here’s how it works:
- if you want to include people with a certain tag then just add the “Tagged with” filter
- if you want to exclude people with a certain tag just add the “Not tagged with” filter
You can probably see some uses for this right away, but we’ll look at an example or two in the next section.
#2 Adding a subscriber to a campaign
Email campaigns are those automated sequences of emails that get triggered when subscribers meet certain conditions.
As you might expect, the addition of a tag to a subscriber is one of those conditions.
(In campaign-speak it’s an entrance condition).
This means you can use a tag to kick off any of your email campaigns. Pretty nifty, huh?
#3 Removing a subscriber from a campaign
As well as entrance conditions, Podia’s email campaigns also support exit conditions.
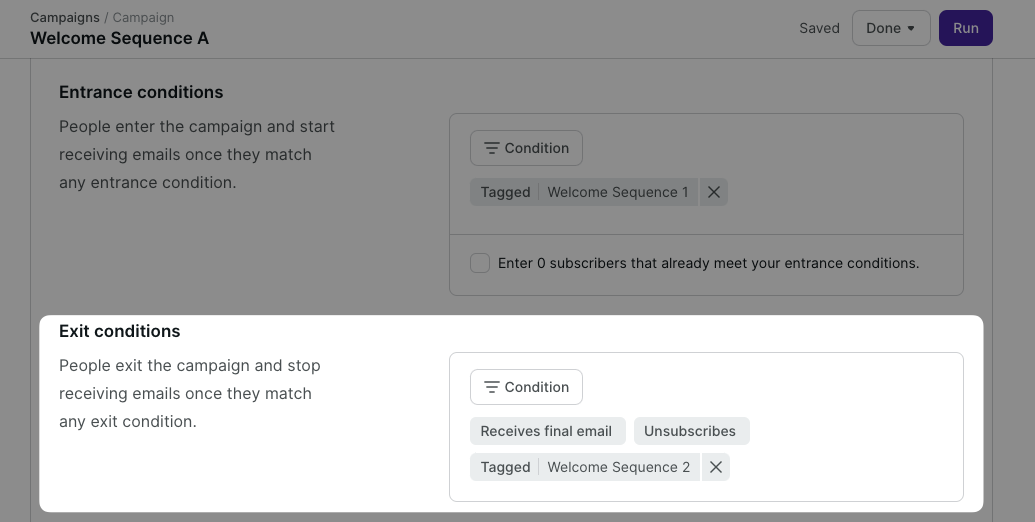
When a subscriber in a campaign sequence gets a new tag, it can act as a trigger for removing them from the campaign.
We’ll see why that’s useful in the next section.
4 Scenarios Where Tags Really Shine
Okay, so we’ve covered how subscribers get tags, and what tags enable within Podia once they’ve been added, but how does it all tie together?
Let’s look at some examples of real-world scenarios so you can see the power of tags in action and get some inspiration for your own email efforts.

#1 Creating form-specific welcome campaigns
We already talked about how Podia now allows multiple email forms, each with its own tag or tags which are automatically added to new subscribers.
So you could have a generic “get my newsletter” form on your front page, and more focused opt-ins on other pages aimed at different audiences.
For instance, you could have a dedicated opt-in page for people who find you via your podcast.
Or one that acts like a contact form and grabs a visitor’s name and email before letting them book a free Zoom call with you.
The cool thing is that using each form-specific tag as campaign trigger, you can send different welcome emails to those different groups.
Here’s how to do it:
- Create a separate tag for each email form, e.g., “Email Form: Front Page” or “Email Form: Podcast Listener”.
- Add those tags to the corresponding email forms within the Site Builder
- Create a new email campaign for each of the forms and populate it with the emails you want to send.
- Add each form-specific tag as an entrance condition for the relevant campaign.
Pretty straightforward, right?

#2 Segmenting subscribers by their interests
The more relevant your emails are to the people who receive them, the better a response they’ll get. I’m talking about higher open rates, higher click-throughs, and fewer unsubscribes.
That’s why it’s smart to segment your list according to your subscribers’ specific interests.
As an example, if you run a site for pet owners it would be useful to differentiate cat owners from dog owners, right? That way cat owners can get cat emails and dog owners can get dog emails. (And owners with dogs and cats can get both!)
Fortunately, you can use interest tags to segment your audience.
But you might be wondering: how do you set those tags in the first place?
Here are a few ways to do it:
- If your site has different opt-in paths that correspond to different interests, add the appropriate tags to your email forms.
- If you have a one welcome sequence for everyone, ask subscribers about their interests in an early email and use link tagging to capture their choice in Podia.
- If certain behaviours suggest certain interests, then use those to add interest tags, e.g., if a subscriber clicks the link for your homemade dog food recipe, they’re probably a dog owner, right?
Remember: information is power!
#3 Creating “one-click” opt-in links
Let’s say you’ve created an email mini-course that showcases your expertise and also leads to a promotional offer.
It would be kind of pushy to start sending it to everyone on your email list, uninvited. Much better to let people raise their hands instead.
Fortunately, using Podia’s link tagging feature you can let people opt in with a single click.
Here’s how to do it:
- Create an “opted in” tag, e.g., “Opted in: Free mini-course”.
- Add the new tag as an entrance condition for your mini-course campaign.
- Create a simple landing page using the Site Builder containing a quick message like: “Thanks for signing up for my mini-course! You’ll get your first email in a few minutes.”
- Promote your mini-course via a broadcast email (or two) by linking to the landing page (“Click here to sign up!”) and using link tagging to automatically add the “opted in” tag.
Pretty smooth, no?

#4 Letting people opt out of specific promotions
One of the main advantages of having an email list is promoting products and services from time to time.
And while running a promotion you may decide to ramp up your email activity, for instance switching from weekly to daily emails.
But there’s a problem…
Not everyone will like the change of pace (or the promotion itself!) and some may unsubscribe just to reduce the noise — even if they were enjoying your weekly emails.
That’s not good. No one wants to lose fans. (And who knows, maybe they would have liked a future promotion.)
The solution is letting them opt out of the current promotion without leaving your list altogether.
Here’s how you do it:
- Create an “opt out” tag, e.g., “Opted out: Q4 2023 Promotion”
- Create simple landing page using the Site Builder containing a quick message like: “Thanks for updating your email preferences!”
- Add text to every promotional email saying: “Not interested in this offer? Click here!” and link it to your landing page, using link tagging to automatically add your “opt out” tag
- When sending your promotional broadcast emails, use a “Not tagged with” filter to exclude any subscribers who have the “opt out” tag
It’s a win-win. You’ll come across as a more considerate marketer, and you’ll lose fewer people who would otherwise have unsubscribed.
By the way, this same technique works if your promotion is running via an automated email campaign. Just add the opt out tag as an exit condition within the campaign itself.
How Should You Name Your Tags?
As we’ve already learned you can call your tags whatever you like, but the future you will appreciate present day you for not being too cryptic.
After all, a tag called: “Latest promotion” might make sense to you now, but in six months time, not so much.
So I like to create a consistent naming convention so that they’re easier to understand.
I also like to think of tags as naturally grouping into certain categories, based on their purpose. Let’s see what they are.
Category: Source tags
Source (or origin) tags remind you where subscribers originally came from.
Examples:
- Source: Imported from MailChimp October 2023
- Source: Business card (added manually with permission)
- Source: Referral
Category: Interest Tags
Interest tags tell you about subscribers’ specific interests.
Examples:
- Interest: Email Marketing
- Interest: Keto Diet
- Interest: Upcoming Mastermind 2024
Category: Behaviour tags
Behaviour tags help you keep track of significant actions people take.
Examples:
- Clicked: Coaching Sales Page
- Booked: Free Discovery Call
- Joined: Facebook Group
Category: Preference tags
Preference tags capture specific choices or preferences that people have expressed.
Examples:
- Opted in: Social domination mini-course
- Opted out: Summer Promotion 2023
So how do you add these tags?
With all of these categories, sometimes you can add the tags automatically, sometimes you’ll have to do it manually (if for example the relevant behaviour happens outside of the Podia ecosystem.)
In each case you’ll have to decide if the effort of adding the tag is justified. Remember: a little information goes a long way.
Tags Are Just The Beginning…
This guide has focused on tags. But tags are not the only way to create powerful workflows around Podia Email.
Many of the tag-powered features discussed above — such as filtering broadcast recipients, triggering campaigns, and removing people from active (but no longer relevant) campaigns — can also be controlled by other criteria within Podia, like:
- Signing up for (or owning) a specific product
- Joining (or belonging to) a specific community plan
- Joining (or being on) a specific waitlist
In fact, when you combine these criteria with tags, you’ll be amazed at what you can do!
Ready to Get Tagging?
Tags aren’t particularly glamorous, but they are powerful. It’s time to level-up up your tag know-how and unleash the full power of Podia Email.